Showing posts with label Cardigan. Show all posts

Wednesday, March 28, 2018

10 & Again

Ten of what?

Again? What again?

You see, there was this girl who liked to sew. One day she realized she had been buying fabric exponentially quicker than she can sew things.

A sewing fairy came to her and suggested she stop buying fabric until she had sewn all the fabric she already had/

A sewing gnome sprang up and laughed in the face of the sewing fairy. Claiming her suggestion was ludicrous and totally impossible! The sewing gnome suggested the girl  not even entertain the idea of such impracticality. She can buy fabric if she so pleases!!


Then along comes Persephone the Sewing Cat. With her small mew she suggests a path of compromise and logic.

She suggests I sew 10 things before I buy more fabric again.
 This sounds reasonable and doable.

She reminds me I can't just play the system, I have to sew 10 legit things. Sewing 10 placemats doesn't count. but a dress, a blouse, PJs,  a set of 6 placemats, etc. 3 tops count as 1 legit item.

She's bossy.

So. here I am on my journey. "Sewing 10 to buy fabric again"

BONES and a new cropped cardigan.
A full point for this project!

Loving draped necklines! 1/3 a point


Trial top, new pattern- needs adjustments next go around. 1/3 point


All 3- skirt, camisole, cardigan (pictures above as well)
another FULL point here!


Top for Neeley & Hat for Macie. giving myself a full point for the 2.
Persephone approved it.


Shirt for my son 1/3 point,


all 3- tights, skirt, top
1 whole point!


Just the striped top here, so just 1/3 point. I like  side bust darts, dart give good shaping.  But darts with stripes makes like arrows pointing to, well.... yep. I'll wear the cute cardigan with this, too.

I made 2 tops, not pictures. 2/3 points...

I think the total is 6 points!

And I have some new things for NO PANTS APRIL!!

Monday, March 26, 2018

Bones & Pirates

Last week's Femsical Dress brings me 1 step closer to being ready for NO PANTS APRIL!


The patters is Sunshine Dress from Patterns For Pirates

The pattern has 3 different bodice styles. The one pictures, the halter top, is what I made. I made a long version, and I made the skirt be more A-line, with less gathers. So I measures the circumference of the lower bodice edge (front and back separately -they are different numbers)). Used those numbers as how wide to cut my skirts at the waist (plus 1" each piece)- but angles out the entire length of the skirt.

I was able to match up the skirt pieces to have hands sticking out of my pockets!


Be Careful not to have hands or mouth bones on 'the girls', though!

AWKWARD!

I use this see-through-grid patterns tracing fabric from JoAnns. I can see where the bones will be on the pieces,

I got rib placement on my back and pelvic bone placement close to my pelvis....

... but ended up with a hand on my bum, still.
The cute cropped cardigan? Also from Patterns 4 Pirates . The Cocoon Cardigan.

The fabric for both dress and bolero-style cardigan are from SO SEW ENGLISH


If you haven't heard yet...
Next Months is NO PANTS APRIL!
Join Us!


Saturday, March 17, 2018

Cardigans and Drapes

I bought some ombre fabric from So Sew English.
This is the olive. I bought the black-grey.
I have been seeing a lot of duster-length cardigans lately and thought it might be nice to wear around the house and be a bit more Dressy than my TARDIS bathrobe to keep me warm.

So I Got to work altering a cardigan pattern to be dolman sleeves and duster length. I got it all finished except for the trim and hem. Even got nice roomy pockets.
But I didn't like it. I have been doing a free 14 day wardrobe challenge called Adore Your Wardrobe. I do adore most of my wardrobe, just wasn't adoring how I was utilizing it. But this challenge reminded me that if I don't love this cardigan, no sense in finishing it only to have something I'm not sure I even like hanging in my closet.


 I do like draped neck tops though! So I decided to cut the cardigan apart and salvage what I could to make a draped neck top. Now I love what I made!

Here is How I made it:
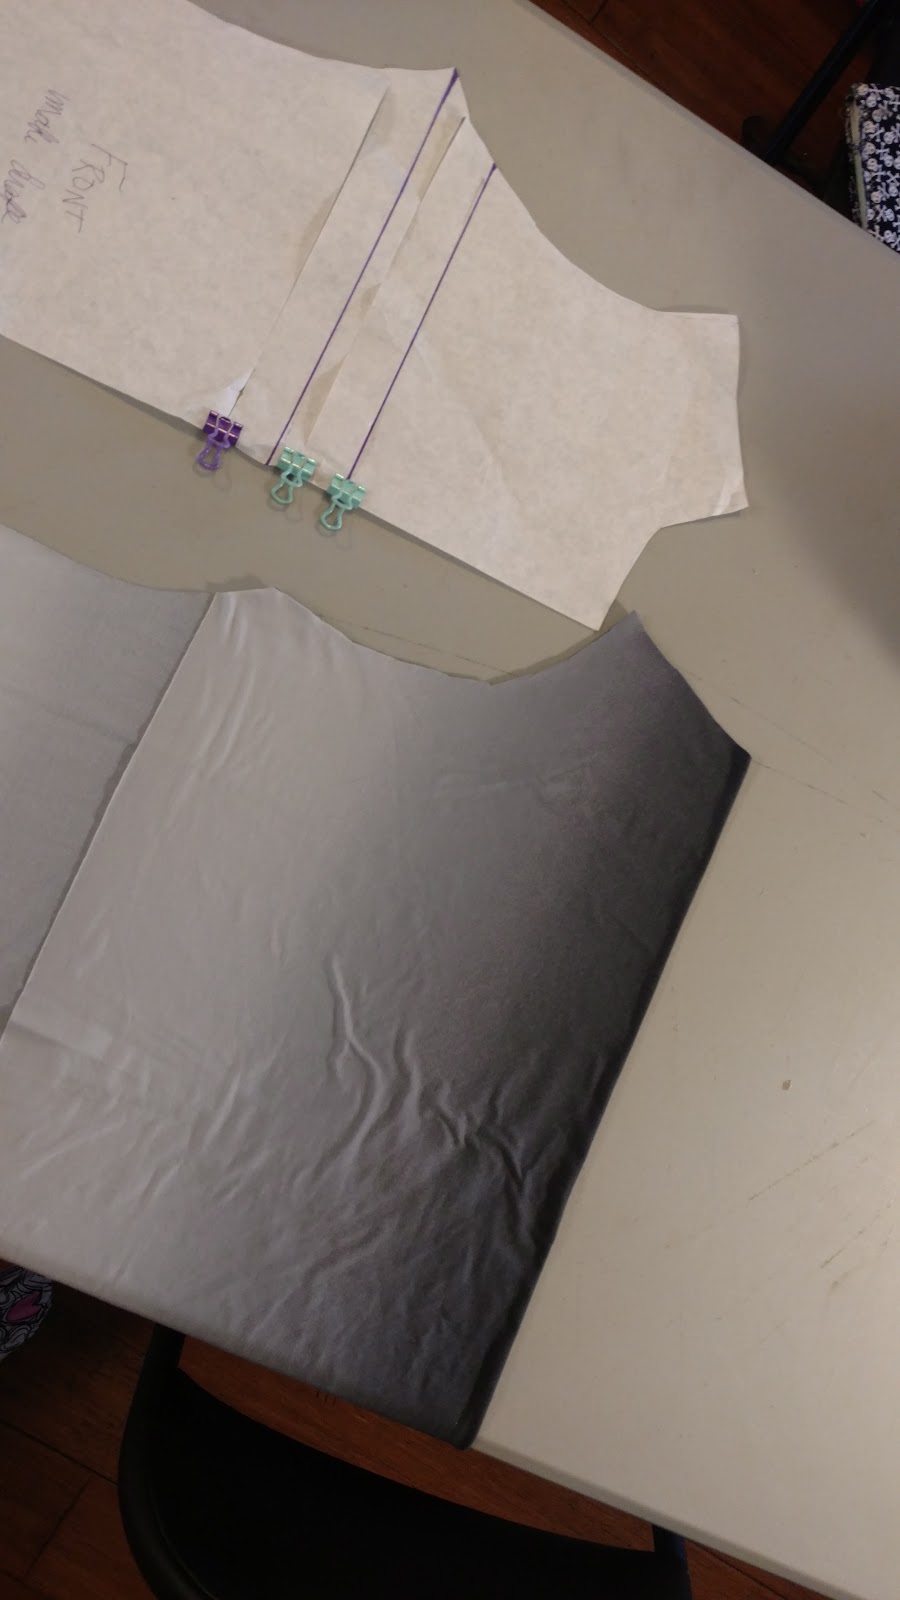
Cut the front and back of my cardigan apart and laid my Drape-Neck Bodice on the back- centered.

To make my bodice pattern piece, (I'll post  link to the video that helped me with this- at the end of my blog entry).

To make the front bodice piece be drape-y, cut 1-3 lines mid arm hole / bottom armhole- like up there in my picture. Don't cut all the way! leave 1/4 attached.
Spread the bodice open. More spread for more drapes, Do you want just a little drape by the neck (not lots of drape all down the torso like mine)- just cut one line- mid armhole - spread it about 3-4" open.

You need the drape to be self lined. Do this by folding over ~13" on the top of the fabric, place the shoulder seam on this fold. where my scissors point.  Some pics to demonstrate:


This next step is crucial:
then place a cat on the pattern to hold in place:


Don't have a cat? another option is curtain weights. Or sometimes a roll of scotch tape, cell phone, and a stapler work.

Now, cut out the front bodice but NOT the neckline! Start Cutting at the shoulder seam where the scissors point:


here is what it will look like cut and with the drape unfolded:

I was going to use the front pieces as my back piece, but I could not get the pockets seam-ripped!

SO I cut the back out of some black I had (from another idea that fizzled)
Now to sew up the seams!
1st- I sewed the drape at the armholes- with right side together- this finishes the armhole fronts- no need to face or hem!


Then I  cut binding for the neckline and armholes on the BACK piece and attached them. (when cutting binding to hem curved edges on knit, I cut the binding a bit shorted than the neckline/armhole. 10-15% shorter)

Next; I sewed the side seams first as I wanted less in the way when doing the shoulder seams;
I left the ~1" of the lining out- not sewn into the seam (this is different than the method in the video I will be posting at the end)


this way I could fold over and tack the lining in place- giving a more finished look to the armhole.


For the shoulder seam- I deliberately cut the front wider than the back so I could make the shoulder seam drape as well. I like the look better this way.
I folded under the upper edge of the front shoulder seam and put the back shoulder seam into the front, since the front had that lining, and made folds along the edge:


Sew in the direction of the fold.
Hem the lower edge and it's done!


Is it femsical? It is feminine, but not whimsical. That's OK. I have some DNA earrings to add WHIMSY!
Getting ready for NO PANTS APRIL.
Here is the YouTube tutorial I watched to learn how to do a drape neckline. It will explain things better than I did, but I did a few things differently.


Watch it for better instructions! I'm not great a explaining.
THANK YOU Cloud Factory for showing me how to make this!

BOTH the black DBP and Ombre SBP fabrics are from So Sew English


LinkWithin

Related Posts with Thumbnails